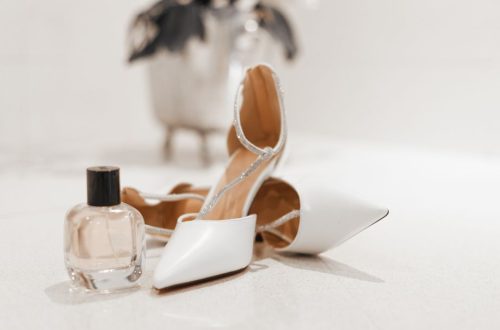
Mid heels can give a city outfit a little lift without demanding the concentration of a towering pair. Yet the pavement outside your front door is rarely as forgiving as a carpeted fitting room. Sloping kerbs, loose paving slabs and sudden changes from stone to cobbles all affect how a shoe feels underfoot.
Comfort comes from choosing a stable fit, taking a manageable stride and recognising when the surface calls for a slower pace. A thin insole can help with a particular fit issue, but it cannot do all the work. Here is how to make mid heels a more comfortable part of your everyday wardrobe.
Start with a heel you can balance on
There is no single heel height that feels moderate to everyone. The useful question is whether you can stand naturally in the shoes, with your weight settled rather than tipping forwards. If you are bending your knees, gripping with your toes or leaning back to compensate, try a lower heel or a different shape.
A broader heel gives you a wider point of contact with the ground, which can feel steadier on uneven paving. Look at the heel from behind as well as from the side: a narrow base may feel quite different from the chunky outline suggested by the upper part of the shoe.
Check the rest of the construction too. The shoe should hold your heel without pinching, leave your toes room to rest and bend where your foot bends. An ankle strap can make a shoe feel secure, provided it does not need to be pulled painfully tight. No amount of walking technique will make an unsuitable fit comfortable.
Check the fit before leaving home
Try your heels with the hosiery you intend to wear. Bare feet, tights and socks can each change how much your foot moves inside a shoe. Walk across a clean, firm floor, turn in both directions and pause with your feet side by side.
- At the toes: check that you can relax them instead of curling them to keep the shoe on.
- At the heel: notice whether the back slips up with every step or rubs as you turn.
- Across the foot: look for pressure from seams, straps or a stiff edge.
- Underfoot: check whether you slide towards the front when standing still.
Do not rely on a long walk to soften a tight pair. Wear unfamiliar shoes for short periods indoors first, where you can take them off easily. If a particular spot already hurts, address it before making those shoes your choice for a day across town.
Find a relaxed, upright position
Before setting off, stand with your feet comfortably beneath your hips and soften your knees. Let your shoulders drop, keep your head upright and look ahead along your route. Avoid trying to hold yourself in a rigid, exaggerated posture; you need enough freedom to respond to changes underfoot.
Keep your bag close to your body if possible. A heavy tote swinging from one shoulder can make balancing feel more awkward, especially when you are also carrying shopping. A manageable load and free hands make it easier to use a handrail or steady yourself when necessary.
Shorten your stride without shuffling
The stride that feels natural in trainers may be too long in heels. Take slightly shorter steps, allowing each foot to land closer beneath you. You should not have to reach forwards with your leg or push hard from your toes to keep moving.
On a level stretch of pavement, aim for a gentle heel-to-toe movement rather than stamping down on the heel or walking entirely on the balls of your feet. Let the shoe settle before transferring your weight. The movement should feel controlled, not like a performance of a particular walk.
Keep a little space between your feet instead of crossing one directly in front of the other. A catwalk stride may look elegant in a photograph, but it gives you less room to adjust when a paving slab tilts. Practise at an unhurried pace, then let your rhythm develop naturally.
Read the pavement a few steps ahead
You do not need to stare at your shoes, but it helps to scan the ground ahead for gaps, broken edges and changes in level. Choose a smoother line when one is available. A small adjustment made early is usually easier than a sudden sideways step at the last moment.
Gaps, grates and cobbles
Step around drainage grates and wide joints rather than placing a slim heel into them. On cobbles, slow down and choose the flatter stones where practical. Take small, deliberate steps and avoid twisting on a planted heel. If the surface feels too unstable, use another route or change shoes.
Kerbs, slopes and steps
Approach a kerb squarely where you can, leaving yourself time to judge its height. On stairs, use the handrail and place as much of the shoe on the tread as the space allows. Avoid leaving your heel hanging over an edge. On a slope, shorten your steps further rather than leaning back and letting your feet run ahead.
Wet stone, smooth tiles and fallen leaves deserve extra care. A heel that feels secure on dry paving may behave differently on a slippery patch. Slow down, avoid abrupt turns and take the available handrail. There is no benefit in preserving your pace at the expense of your footing.
Use insoles to solve a specific problem
Start by identifying what feels uncomfortable. Is your foot sliding forwards, is the forefoot under pressure, or is the back of the shoe rubbing? Adding padding everywhere can crowd the shoe and create new pressure points, so make one small adjustment at a time.
A slim forefoot cushion may soften the feel beneath the ball of your foot, while a heel grip may help with minor movement at the back. Neither should be used to rescue a shoe that is fundamentally the wrong size or shape. If your toes become cramped after adding an insert, remove it and reassess the fit.
Follow the insert’s fitting instructions and check that it lies flat, with no curled edges. Test it indoors before relying on it outside. Once fitted, make a habit of checking its position before each wear; an insert that shifts or bunches up is unlikely to improve your walk.
Build up walking time and keep the shoes maintained
Make your first outing a short, familiar route with opportunities to sit down. Increase the walking gradually if the shoes remain comfortable. A pair that works for dinner and a taxi journey may still be unsuitable for a lengthy afternoon of shopping, and it is useful to recognise that distinction.
Check heel tips and soles regularly. If a heel tip is uneven, loose or worn through, have it repaired before wearing the shoes again. A cobbler can also advise on sole grip for the particular pair. Keep the soles clean and let damp shoes dry according to their care instructions.
For longer days, carry comfortable shoes that fit securely so you can change when needed. Stop if you develop pain, numbness or persistent rubbing rather than trying to perfect your stride through it. The aim is to arrive feeling comfortable enough to enjoy your plans, with your heels serving the outfit and the journey.